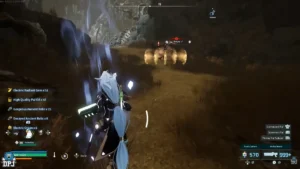
To summon Moon Lord in Palworld, you need to find the Celestial Sigil schematic in the Terraria dungeon, craft the sigil, and use it at a Summoning Altar. Defeating this raid boss takes more than shooting at its body: you must destroy the eyes on its hands and forehead before attacking its exposed chest core. This guide explains how to gather the summoning materials, prepare your raid base, and beat Moon Lord, along with the rewards you can earn from the fight.
Contents hideKey Takeaways
- Find the Celestial Sigil schematic in the final reward chests inside the Sealed Realm of Terraria.
- Collect Hallowed Bars from Terraria enemies and breakable objects, then craft the summoning item at a production assembly line.
- Use a Celestial Sigil at a Summoning Altar to start the base raid.
- Destroy the three eye weak points before attacking the exposed chest core.
The fight has two main parts: breaking the eyes and damaging the chest. Shooting the wrong body parts will not move the encounter forward, so understanding that order matters more than simply firing as fast as possible.
How to Get the Celestial Sigil Schematic

Your first task is to explore the Sealed Realm of Terraria. This dungeon contains the enemies, materials, and reward chests needed to prepare a Moon Lord summon.
Bring a flying Pal for the journey across the water from Fisherman’s Point. Once you reach the dungeon, make room in your inventory before entering. You will need space for materials and any useful loot you collect along the way.
Search Beyond the Main Passages
The dungeon has branching routes, and some paths continue through breakable walls. If you reach what looks like a dead end, check the surrounding walls before returning to an earlier room.
Do not rush past every side area. Exploring gives you more chances to collect Hallowed Bars and find chests while you work toward the boss room.
Clear the Dungeon and Open the Final Chests

Progress through the dungeon until you reach the Eye of Cthulhu encounter. After clearing the boss area, continue to the final reward chests.
These chests are where you should look for the Celestial Sigil schematic. Collect the schematic before leaving, because it gives you access to the recipe needed for Moon Lord’s summoning item.
The schematic and the finished Celestial Sigil are not the same thing. Finding the recipe does not mean you are ready to activate the raid. You still need to return to your base and craft the item.
Collect Hallowed Bars and Craft the Celestial Sigil
Hallowed Bars are the material used to craft Celestial Sigils. Gather them during your dungeon run so you do not have to return immediately after finding the schematic.
Where to Find Hallowed Bars
Defeat Terraria enemies and destroy breakable objects as you explore. Both can provide Hallowed Bars.
Collecting materials throughout the run is more efficient than heading straight for the final room and searching for bars afterward. Keep checking your inventory so you do not leave useful drops behind.
If you want to attempt Moon Lord more than once, gather extra materials before leaving the dungeon.
Craft the Summoning Item
Return to your base and use a production assembly line to craft the Celestial Sigil.
The basic process is:
- Keep the Celestial Sigil schematic available for crafting.
- Open the production assembly line.
- Select the Celestial Sigil recipe.
- Check that you have the required Hallowed Bars.
- Start production and collect the finished item.
A Pal with Handiwork can help complete the crafting job.
Make sure you collect the finished sigil from the station before traveling to the raid base. Carrying only the schematic will not let you start the encounter.
How to Summon Moon Lord at Your Base
Use a separate raid base for the fight rather than a base filled with valuable production buildings. A dedicated location gives you more room to move and keeps your usual work area away from the encounter.
For the base-summoning method, you need a Summoning Altar and one crafted Celestial Sigil
Summoning Altar Materials
| Material | Amount |
|---|---|
| Paldium Fragments | 20 |
| Stone | 100 |
Bring additional construction materials if you plan to repeat the base raid. You will need to rebuild the altar between attempts using this method.
Start the Encounter
Once your raid base is ready:
- Build the Summoning Altar.
- Interact with it.
- Place one Celestial Sigil inside.
- Confirm the summon when you are prepared to fight.
One sigil is enough to start the encounter. Do not add extra sigils expecting them to create a stronger version of the boss.
Before activating the altar, check your ammunition, equipment condition, and available combat Pals. Starting the fight is not the time to discover that your main weapon needs repairs.
Palworld Moon Lord Guide: The Correct Attack Order
Moon Lord’s size can make the fight look confusing, but its damage targets are clear. Focus on the eyes first, then the exposed chest.
Step 1: Destroy the Hand Eyes
Each hand contains an eye that opens during the encounter. Wait until an eye is exposed, then aim directly at it.
Use a ranged weapon that lets you hit the target reliably. Firing into a closed hand or an unrelated body part wastes ammunition.
You can work on whichever hand gives you the clearest shot. Keep moving when necessary rather than staying in a poor position just to maintain fire.
Step 2: Destroy the Forehead Eye

The third eye is on Moon Lord’s forehead. Watch for it to open and attack the exposed weak point.
The height of this target can make aiming awkward. Move into a position where you can see it clearly instead of firing blindly beneath the head.
The essential rule is targeting: all three eye weak points must be destroyed before you can finish the fight through the chest.
Step 3: Avoid the Detached Eyes
Destroyed eyes remain a threat during the encounter. They can detach and attack, so breaking a weak point does not mean the surrounding area is safe.
Keep checking for incoming attacks between shots. Do not focus so closely on the next target that you stop watching your character.
Step 4: Attack the Exposed Chest Core

Once both hand eyes and the forehead eye are destroyed, the chest opens.
Aim at the exposed core and keep dealing damage while avoiding attacks. This is the finishing stage of the encounter.
The full attack order is:
- Destroy the eye on each hand.
- Destroy the forehead eye.
- Attack the exposed chest core.
The important point is to complete the eye phase before trying to finish the boss through its chest.
Preparation Tips for a Smoother Fight
Bring your strongest practical combat setup, but do not expect equipment alone to replace the weak-point mechanic.
A powerful weapon still needs to hit the correct target. Reliable aim and enough ammunition are more useful than repeatedly firing high-damage shots into the wrong part of the boss.
Leave Space to Move
Build the altar in an open part of your raid base. Give yourself room to reposition, follow the moving eyes, and avoid attacks.
Avoid crowding your fighting area with unnecessary structures.
Prepare Your Combat Pals
Bring your best available combat Pals and make sure you are ready before starting the summon. Your Pals can support the fight while you focus on the eyes and exposed core.
Do not wait until the encounter begins to sort out your team.
Account for Your World Settings
Damage settings affect how quickly the boss goes down. Increased player damage can make the encounter much shorter, while default settings require more sustained fighting.
Plan around your own settings and equipment. A short kill under boosted conditions is not a useful measure of how much ammunition another setup will need.
Moon Lord Rewards
Notable rewards include Meowmere, the Moon Lord Mask, and Ancient Civilization Cores.
These are rewards from defeating the boss, not items you need to purchase to begin the encounter.
| Reward | What to know |
|---|---|
| Legendary Meowmere | A notable weapon reward worth watching for after a clear |
| Moon Lord Mask | A wearable reward |
| Ancient Civilization Cores | Materials to collect from successful runs |
Do not expect every attempt to produce the same rewards. Leave inventory space before summoning so you can collect useful drops without stopping to discard items.
A small number of clears also does not establish a reliable drop rate. Plan repeated attempts around your available materials rather than expecting a specific item after a fixed number of kills.